Layered Gift Wrapping: Paper Bands and Contrast Panels
Learn how to layer two papers on one gift: wrap a solid base, then add a belly band with folded edges or a diagonal contrast panel, with tips on sizing, placement and paper combinations.
Tutorial at a glance
Materials
- Solid base wrapping paper
- Contrasting paper strip
- Scissors
- Ruler and pencil
- Clear tape and double-sided tape
Layered gift wrapping is a simple idea with a big payoff: wrap the box in one paper, then add a second paper on top as a band or a panel. The contrast between the two does the decorating, so you can skip the elaborate bow and still end up with a gift that looks carefully put together.
It is also a practical way to use up leftovers. A strip too small to wrap anything is exactly the right size for a band, and a band happens to hide a seam, a small tear or a join in the base paper.
How layering works
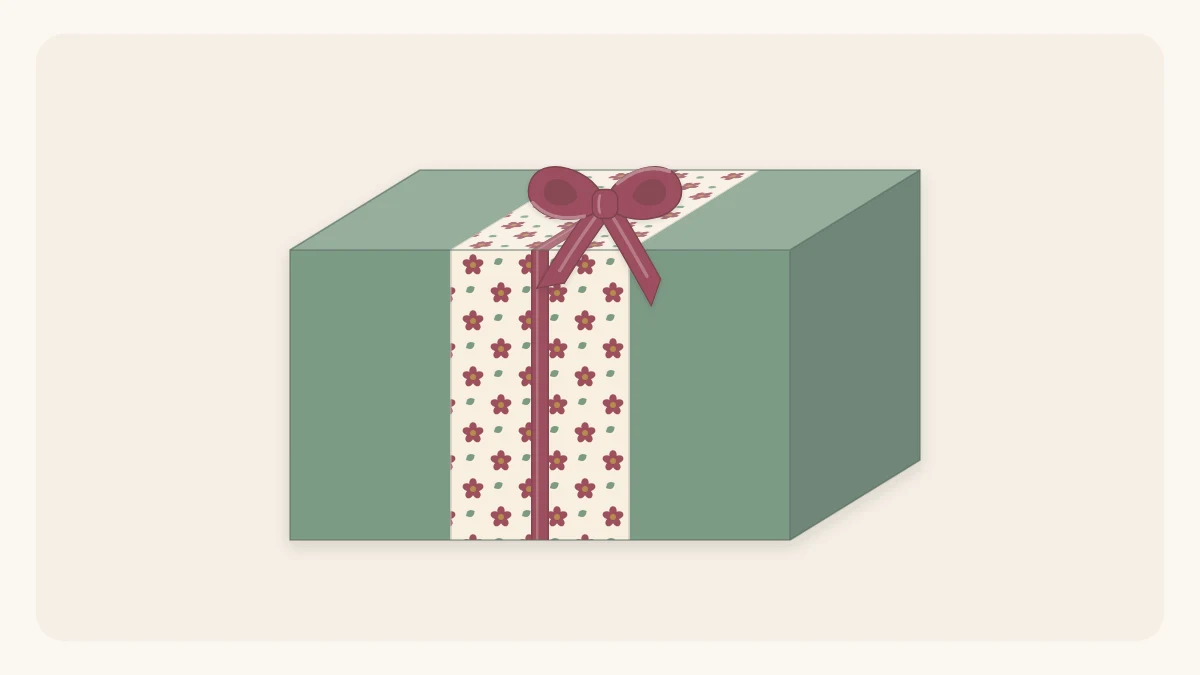
Every layered wrap has two parts. The base is the paper that covers the whole box, and it is usually a solid color. The layer is a smaller piece of contrasting paper that sits on top. The most common layer is a belly band, a strip that goes all the way around the box like a belt.
The one detail that separates a neat band from a scrappy one is the edge. Cut edges are rarely perfectly straight and tend to fray or curl. Folding each long edge under gives you a crisp, straight line and a band with a little more body.
What you need
- A solid base paper, matte and medium weight if possible
- A contrasting paper for the band: patterned, darker, lighter or a different texture
- Sharp scissors, a ruler and a pencil
- Clear tape and, ideally, double-sided tape
- A bone folder or the edge of a ruler for creasing
- Optional: narrow ribbon or twine, and a tag
Wrap the base first
Wrap the box completely in the base paper before you think about the band. Use the usual method: box upside down on the wrong side of the paper, seam on the bottom, ends folded into neat points and every edge creased. If you need a refresher, the full sequence is in how to wrap a gift.
Keep the base snug. A band wrapped around loose paper will slide and wrinkle the surface underneath. For help with cutting the right amount, see how to measure wrapping paper.
How to make a belly band
- Decide the width. A band about one-third of the box length wide, or narrower, looks balanced. On a box 9 in (23 cm) long, that means a finished band of roughly 3 in (7.5 cm) or less.
- Add the fold allowance. Add about 1/2 in (1.3 cm) to each long edge. For a 3 in (7.5 cm) band, cut the strip about 4 in (10 cm) wide.
- Cut the length. The strip needs to go once around the box across its width, plus about 1 in (2.5 cm) of overlap. Wrap the paper around the box to check before cutting.
- Fold the long edges under. Mark light pencil dots on the wrong side, fold each long edge over by about 1/2 in (1.3 cm), and crease firmly.
- Position the band. Turn the box upside down, center the band on the bottom and bring both ends around. Check that it sits square to the box edges on the top face.
- Tape at the back. Pull the band snug, overlap the ends on the bottom of the box and tape them. A small piece of double-sided tape under the band on the top face stops it from sliding.
- Crease the corners. Run a thumbnail along the box edges where the band turns, so it follows the shape of the box.
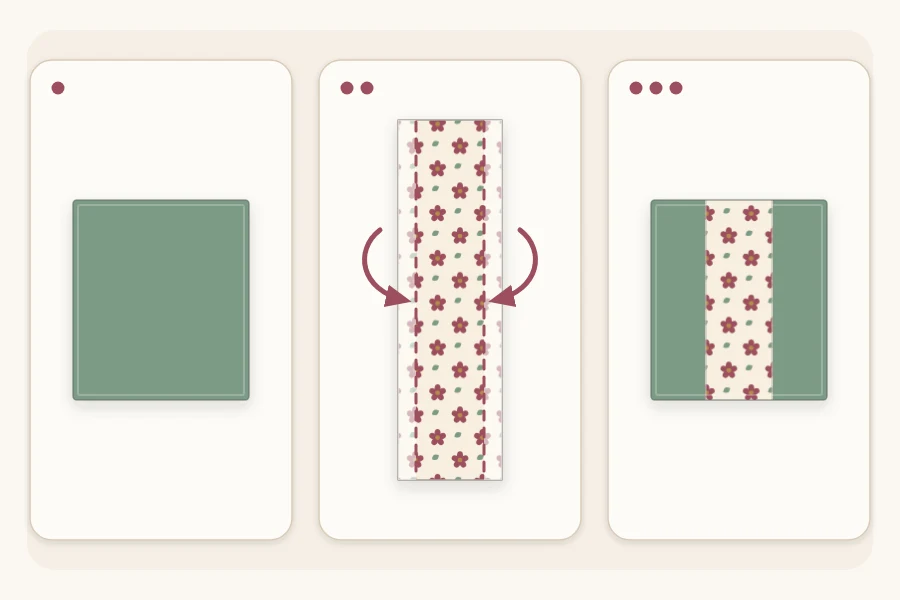
Tip
Roll paper wants to curl. Fold the band’s edges under, then press the strip flat under a heavy book for a few minutes before wrapping it around the box.
Choosing papers that work together
Contrast is what makes the band visible. If the two papers are too similar, the layer simply disappears. Change one thing clearly: the pattern, the lightness or the texture.
| Base paper | Band | Why it works |
|---|---|---|
| Solid color | Small pattern | Pattern stays in one tidy stripe |
| Kraft | White or black | Strong light and dark contrast |
| Dark solid | Pale solid | Clean and graphic |
| Matte | Slight sheen | Same color, different texture |
Two busy patterns together are the hardest combination to get right. If you want a patterned base, keep the band solid and pick a color that already appears in the pattern. For a very quiet version of this look, the ideas in minimalist gift wrapping use the same band at a much narrower width.
Three layering variations
Centered band
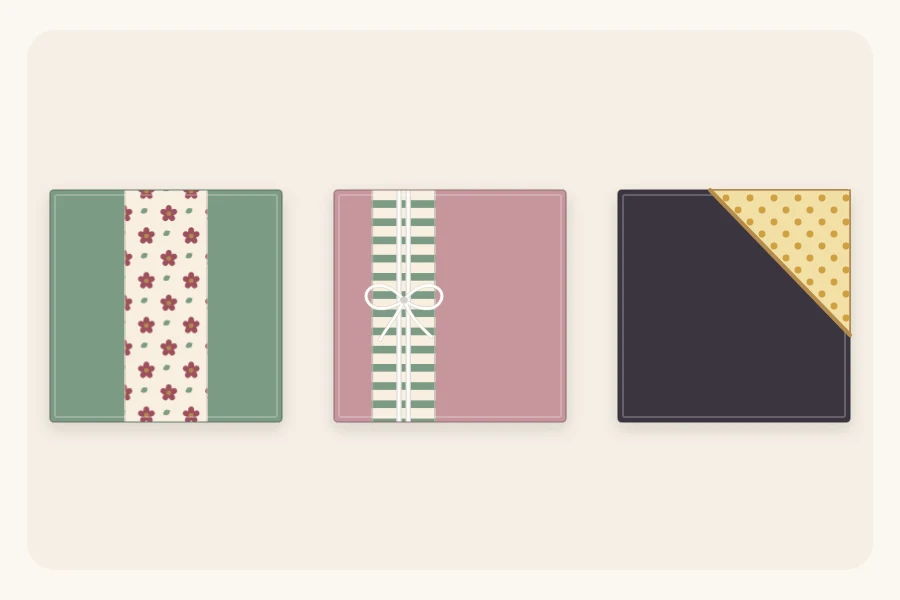
The classic version. The band sits across the middle of the box and gives a formal, symmetrical look. It is the easiest to position because you can measure the same distance from each end.
Off-center band with twine
Slide the band toward one end, about one-third of the way along the box, and wrap twine or narrow ribbon around the middle of the band two or three times. Knot it on top. The off-center placement feels more casual, and the twine adds a third texture without adding clutter.
Diagonal contrast panel
Instead of a strip around the box, cover one corner of the top face with a triangle of contrasting paper. Cut a triangle noticeably larger than the corner you want to cover, and fold its long edge under by about 1/2 in (1.3 cm). Lay it across the corner with the folded edge running diagonally, fold the extra paper down over the two sides, and tape it underneath on the bottom of the box.
Finishing touches
A layered wrap needs very little on top. A narrow ribbon tied over the band, or a tag slipped under it, is usually enough. Because the band holds a tag flat against the box, it is one of the easiest placements there is; see how to attach a gift tag for the other options. Write the names on the tag before you tuck it in.
Fixing common problems
- The band slides around. It was taped too loosely. Pull it snug before taping, and add a dot of double-sided tape under it on the top face.
- The band looks crooked. Measure from the end of the box to the band on both long sides before you tape.
- The layer barely shows. The papers are too alike. Swap the band for something clearly lighter, darker or patterned.
Frequently asked questions
How wide should a belly band be on a gift?
A finished band about one-third of the box length wide, or narrower, usually looks balanced. Cut the strip roughly 1 in (2.5 cm) wider than that so you can fold about 1/2 in (1.3 cm) under along each long edge. Narrow bands look more modern, while wider ones show off a pattern.
Do leftover scraps of wrapping paper work for the band?
Yes, and it is one of the best uses for them. The strip only needs to reach once around the box with a small overlap. If a scrap is slightly too short, place the gap on the bottom of the box and bridge it with tape, since that side will not be seen.
Should the band go on before or after the ribbon?
Put the band on first and tape it at the back, then add any ribbon or twine over the top of it. The ribbon helps hold the band in place and gives you a spot to tuck in a tag. On a simple wrap you can leave the ribbon off altogether.