How to Attach a Gift Tag: Knots, Loops and Placement
Learn how to attach a gift tag so it stays put and faces forward: the lark's head knot, tying a tag into a bow, tucking it under a ribbon and sticking it flat.
Tutorial at a glance
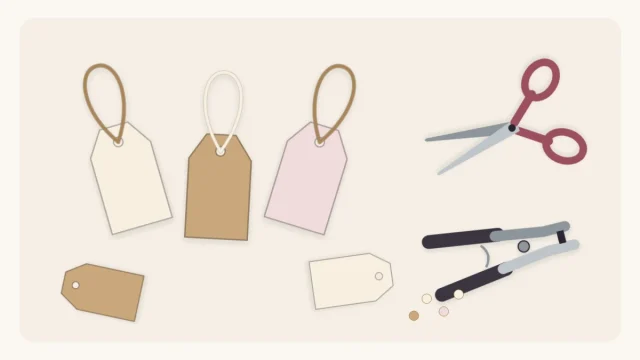
Materials
- Finished gift tag
- Twine or narrow ribbon
- Pen
- Scissors
- Double-sided tape
- Reinforcement ring or small paper circle
Knowing how to attach a gift tag properly is the difference between a tag that hangs neatly where it can be read and one that flips over, slides around or falls off on the way to the party. It takes a minute, and there are only three sensible places to put one.
The steps below cover the one knot worth learning, the lark’s head, plus how to tie a tag into a bow, slip it under a ribbon or fix it flat to the paper when there is no ribbon at all.
Write on the tag first
Fill in the names before the tag goes anywhere near the gift. A loose tag lies flat on the table, so your handwriting stays steady and the ink has time to dry. Writing on a tag that is already tied on means pressing against a bow or a box edge, and that is when smudges and dents happen.
Check the hole while you are there. It should sit about 3/8 in (1 cm) from the top edge. A reinforcement ring, or a second small circle of paper glued over the hole, keeps thin card from tearing when the string is pulled. If you are still at the cutting stage, see how to make gift tags from cardstock.
Choose the string
Thin, slightly rough string holds a tag best. Baker’s twine and jute twine grip well and stay knotted. Narrow ribbon of about 1/8 to 1/4 in (3 to 6 mm) looks dressier, but satin is slippery, so pull its knots firmly.
Cut a piece about 10 in (25 cm) long for each tag. That is enough for the loop, a knot around the ribbon and a little to trim. Longer string lets the tag dangle and spin; shorter string is hard to tie.
Tie a lark’s head knot through the hole
The lark’s head fixes the string to the tag with no bulky knot, and it leaves two free ends for tying on.
- Fold the string in half so you have a loop at one end and two loose ends at the other.
- Push the loop through the hole from the front of the tag to the back, pulling about 1 in (2.5 cm) of loop through.
- Bring both loose ends over the top edge of the tag and pass them through the loop.
- Pull the ends gently until the loop closes snug against the top of the tag. Stop as soon as it is firm; pulling hard can tear the hole.
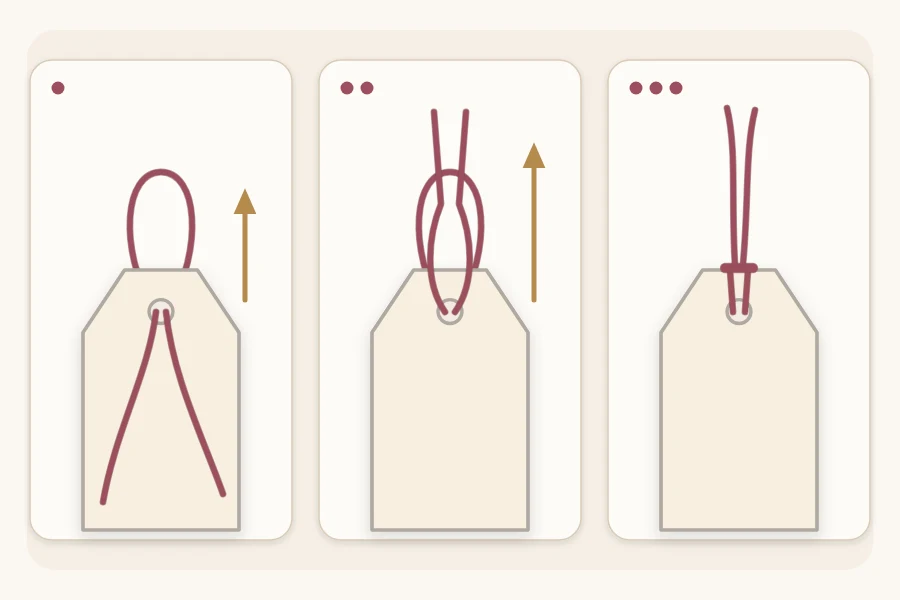
For a tag that faces forward, the smooth bar of the knot should lie across the front. If it ends up on the back, pull it apart and push the loop through from the other side.
Tie the tag into the bow
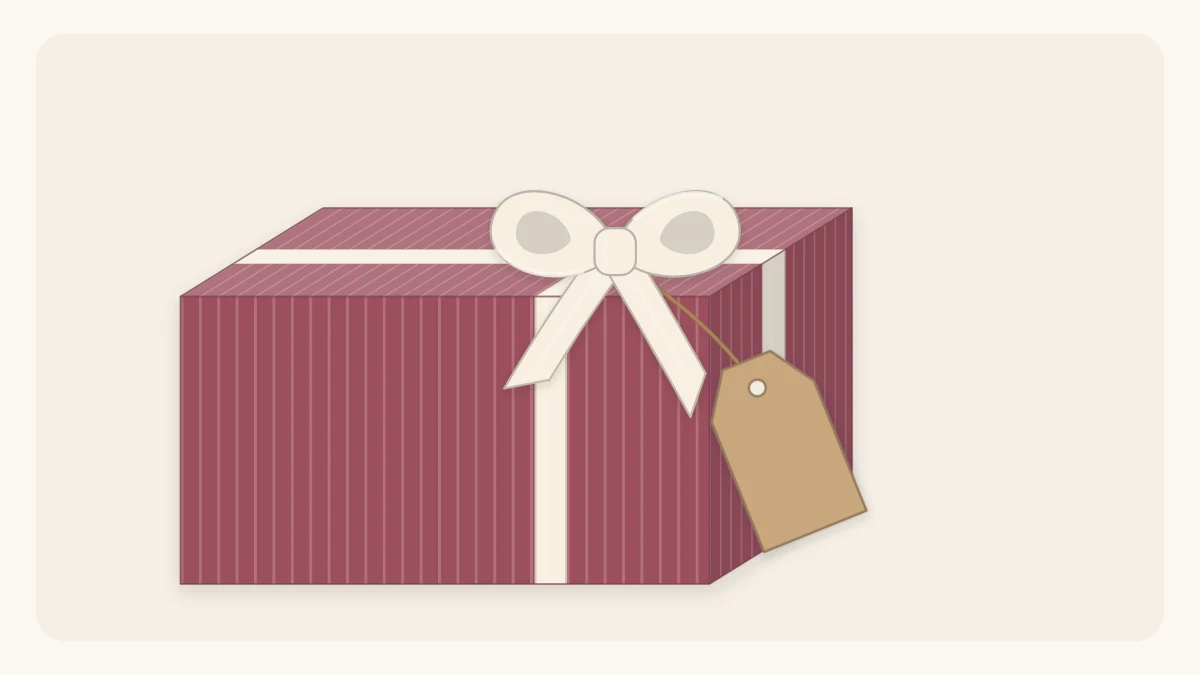
A tag held by the bow’s own knot cannot slide along the ribbon, which makes this the most secure placement. There are two ways to do it.
While tying the bow
Tie the ribbon around the box as far as the first half knot. Thread one ribbon end through the tag hole and slide the tag down to the knot, then finish the bow as usual. The tag sits right under the loops. This works when the ribbon is narrow enough to pass through the hole; the full method is in the guide to tying a bow on a gift box.
After the bow is tied
With a lark’s head already on the tag, pass the two string ends around the ribbon directly beneath the bow’s knot and tie them in a double knot at the back. Trim the ends to about 1/4 in (6 mm), or leave them longer and tuck them under a loop.
Tip
Let the tag hang toward a corner of the box at a slight angle rather than straight down the middle. It reads more easily there and does not hide the bow.
Slip the tag under a ribbon or band
When the ribbon is tied flat around the gift without a bow, or the gift has a paper band, the tag can simply be tucked in. Slide the top third of the tag under the ribbon so the names stay visible below it. The ribbon needs to be snug for this to hold.
For extra security, put a small piece of double-sided tape on the back of the tag where the ribbon covers it. The same trick works with a paper belly band, as used in layered gift wrapping: tuck the tag under one edge of the band before you tape the band closed at the back.
Stick the tag flat to the paper
Gifts with no ribbon still need a name. A flat tag stuck directly to the paper is tidy, stacks well under other presents and suits gifts that will be mailed or carried in a bag.
Use one or two short strips of double-sided tape on the back, pressed down firmly. Set the tag in a corner of the top face, roughly 1/2 in (1.3 cm) in from both edges, or line it up with the center seam of a band.
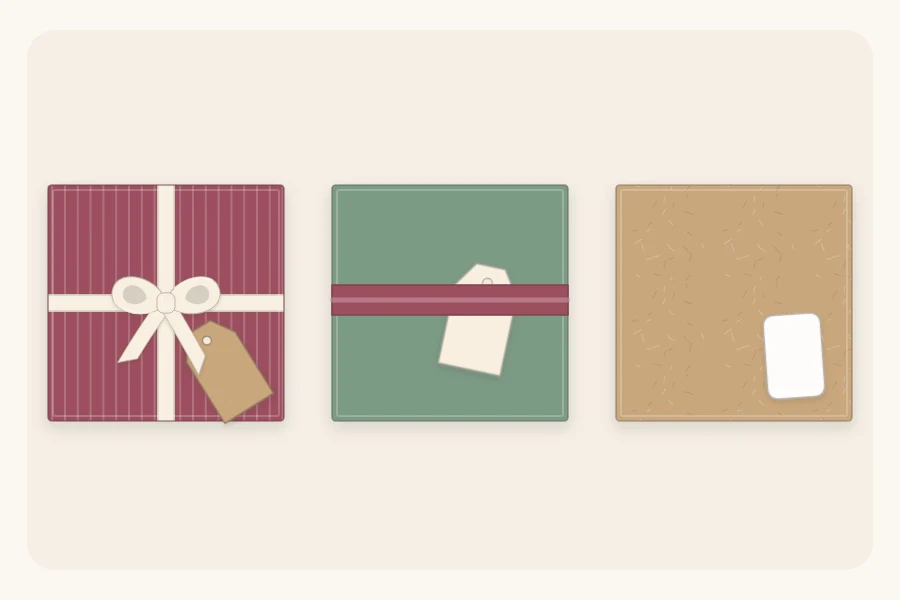
Which placement suits which gift
| Placement | Best for | Holds with |
|---|---|---|
| Tied into the bow | Boxes with a cross-tied ribbon | The bow’s knot |
| Under a ribbon or band | Flat ties, belly bands, twine wraps | Tension, plus hidden tape |
| Stuck flat | No ribbon, stacked or mailed gifts | Double-sided tape |
Fixing common tag problems
- The tag keeps flipping to its blank side. Shorten the string so the tag rests against the box, or write the names on both sides.
- The hole has torn. Glue a small circle of paper over the tear on each side, let it dry and punch again through the patch.
- The tag slides along the ribbon. Move it to the bow’s knot, or add a hidden dot of double-sided tape behind it.
- The string looks messy. Trim both ends to the same length on a diagonal.
If the tag itself looks too plain once it is on, there are plenty of quick gift tag ideas for shapes and layers to try on the next one.
Watch out
Keep twine, ribbon and loose tags away from babies and pets, and give children adult help with scissors when trimming string.
Frequently asked questions
Where should a gift tag go on a present?
Put it where it can be read without lifting the gift. On a box with a bow, hang the tag from the knot so it rests toward a corner. On a gift with no ribbon, stick it flat in a corner of the top face. Avoid the underside, where the paper seam sits.
How do you attach a gift tag without string?
Use double-sided tape on the back of the tag and press it straight onto the wrapping paper, or slide the top of the tag under a snug ribbon or paper band. A folded tag can also hang over a ribbon like a tiny card, held by a small piece of tape inside the fold.
What knot is used for gift tags?
The lark's head is the usual choice. Fold the string in half, push the loop through the hole, pass both ends through the loop and pull it snug. It lies flat, does not come undone by itself and leaves two free ends for tying the tag to a ribbon or a bag handle.