Pleated Gift Wrapping: How to Add Folded Pleats to Paper
Learn how to fold neat pleats into wrapping paper before you wrap: how much extra paper to allow, how to keep the folds straight, and how to turn one pleat into a pocket for a tag or sprig.
Tutorial at a glance
Materials
- Solid medium-weight wrapping paper
- Ruler and pencil
- Bone folder or ruler edge
- Clear tape
- Scissors
Pleated gift wrapping adds a band of crisp folds to the paper itself, so the decoration is built into the wrap rather than tied on top. A row of four or five pleats across the front of a box catches the light, gives plain paper some texture, and makes a handy pocket for a tag or a sprig.
It looks intricate, but the technique is only one small fold repeated a few times. The single thing to remember is the order: the pleats go into the flat sheet first, and the box gets wrapped afterward.
How pleats work
A pleat is a small fold of paper doubled back on itself. You fold the paper one way, then fold it back the other way a short distance along, so a narrow flap lies flat on the surface. Each flap is about 1/2 to 3/4 in (1.3 to 2 cm) deep.
Because the paper doubles back, every pleat uses up about twice its depth. A pleat 1/2 in (1.3 cm) deep shortens the sheet by about 1 in (2.5 cm). Five of them shorten it by about 5 in (13 cm). That missing length is the reason pleats cannot be added after the paper has been cut to fit.
What you need
- Solid or subtly patterned medium-weight wrapping paper
- A ruler and a pencil
- A bone folder, or the edge of the ruler, for creasing
- Clear tape
- Scissors
- Double-sided tape for the final seam (optional)
Paper choice matters here. Solid, matte, medium-weight paper shows pleats best, because the shadows of the folds are the whole effect. Busy patterns hide them. Thin glossy paper tears along repeated creases, and foil paper keeps every misplaced fold permanently. The guide to types of wrapping paper can help you pick a suitable sheet.
Measure with the pleats in mind
Start with the normal measurements for a box: one turn around the girth plus about 2 in (5 cm) of overlap, and at each end a little more than half the box height. The details are in how to measure wrapping paper.
Then add the pleat allowance to the direction the pleats will shorten. For five pleats of 1/2 in (1.3 cm), add about 5 in (13 cm).
Tip
Fold a practice strip from scrap paper first. It shows how deep and how far apart you like the pleats, and how much length they really take up.
How to fold straight pleats
- Decide where the pleats will land. Lay the sheet wrong side up, set the box on it and mark lightly in pencil the area that will cover the top or front face. The pleats belong inside that area.
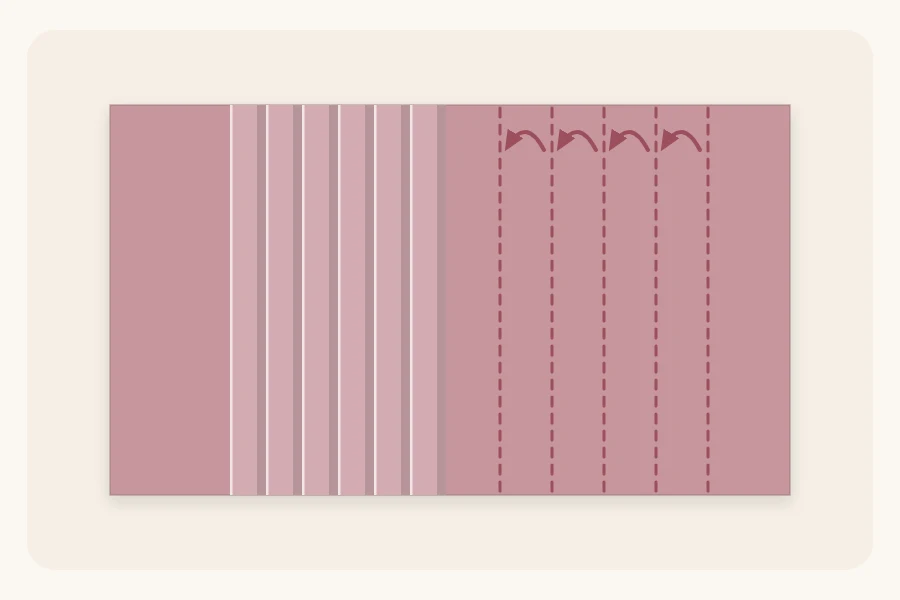
- Make the first fold. Turn the paper right side up. Fold it across its full width at the point where the first pleat should sit, wrong sides together, and crease firmly.
- Fold back. Measure about 1/2 in (1.3 cm) from that crease and fold the paper back the other way, so a narrow flap lies flat on the surface. Crease it firmly.
- Repeat. Make the next pleat right beside the first, or leave a small even gap. Use the ruler each time so the pleats stay parallel. Four or five pleats is plenty for a medium box.
- Sharpen every crease. Run the bone folder or the ruler edge along each fold.
- Tape the back. Turn the sheet over and run strips of clear tape across the pleats on the wrong side. This holds them closed while you wrap.
Wrap the box
- Lay the sheet wrong side up and place the box upside down on it, with the top face of the box centered on the pleated section.
- Check the fit and trim any extra paper now.
- Bring one long side up to the middle of the box and tape it. Fold under about 1/2 in (1.3 cm) on the other long side, pull it snug over the first and tape it. The seam ends up on the bottom.
- Fold each end: press the top flap down, fold the two side flaps in, then crease the last flap into a point, fold it up and tape.
- Crease along every box edge.
Take extra care at the ends, where the pleats add layers and the paper is stiffer. Crease those folds slowly and firmly instead of forcing them. If end folds are new to you, the full method is in how to wrap a gift.
Diagonal and fan pleats
Once straight pleats feel comfortable, two variations change the look completely.
Diagonal pleats
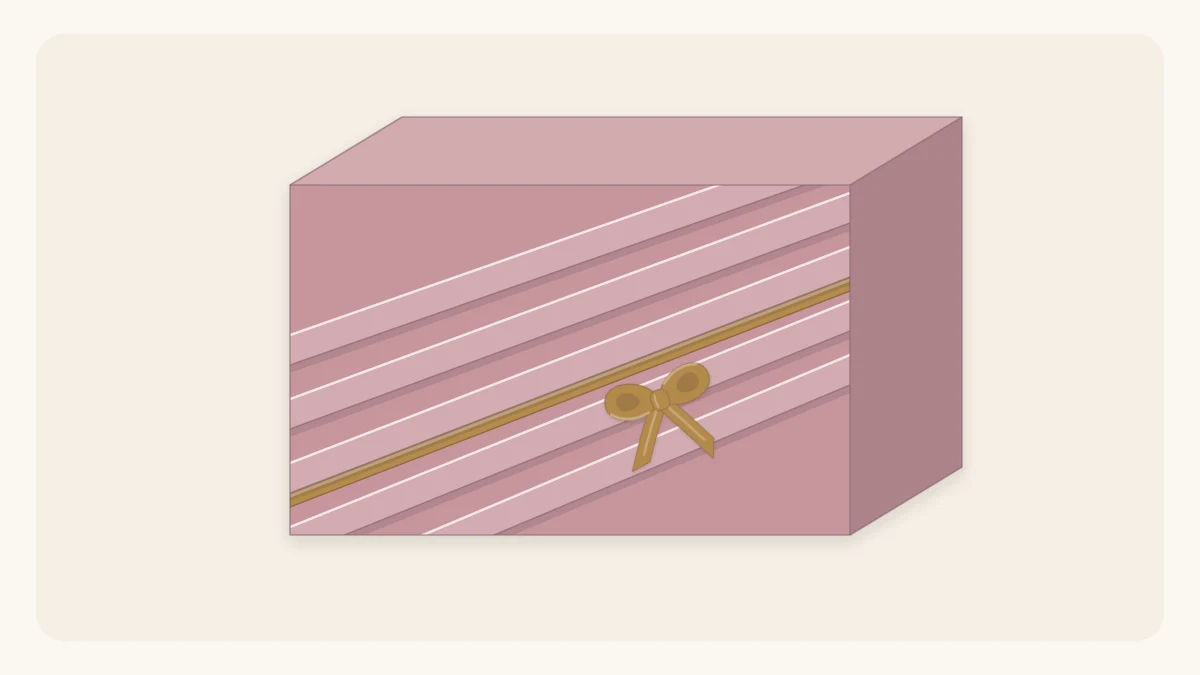
Fold the pleats at an angle across the sheet instead of straight across. They will run corner to corner over the front of the box. Angled folds leave the edges of the sheet stepped and uneven, so begin with a noticeably larger piece of paper, fold and tape the pleats, then trim the sheet square before wrapping.
Fan pleats
For a fan, make each pleat slightly deeper at one end than the other, so the folds spread apart like the ribs of a fan. Keep the difference small. This version is harder to keep even, so pencil the fold lines lightly on the wrong side first.
Using a pleat as a pocket
Each pleat is a tiny open flap, and that makes it useful. On the wrong side, leave a gap in the tape behind one pleat so the flap can open a little. Then slide something flat into it from the front:
- A gift tag or small card with the names already written
- A thin ribbon, tucked in at one end and trailing across the front
- A light sprig of greenery
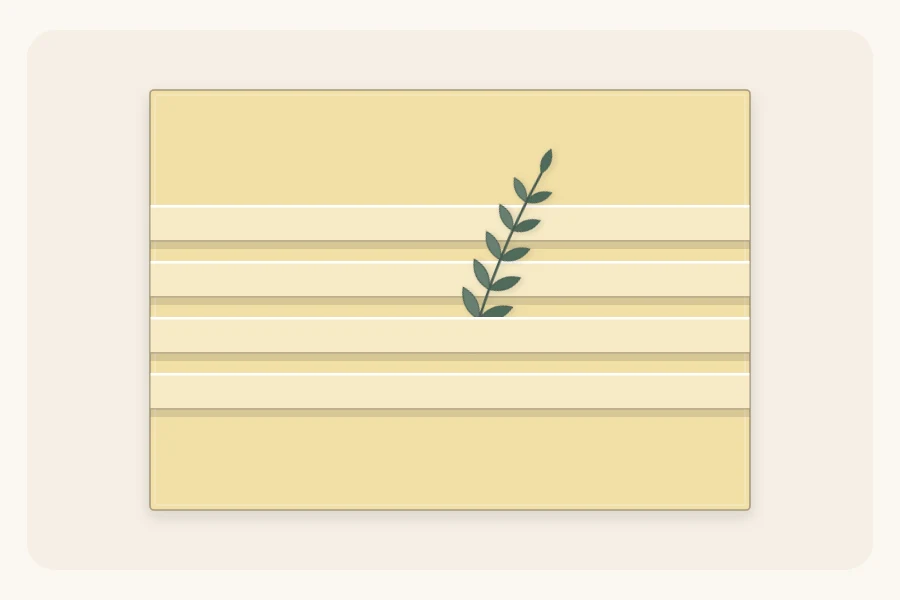
Keep whatever you tuck in light and flat, and add natural pieces last because they are fragile. More ideas of this kind are in decorative gift toppers.
Fixing common problems
- The paper is too short. The pleat allowance was missed. Use the sheet on a smaller box, or cover the gap on the bottom with a strip of matching paper.
- The pleats are crooked. Measure the depth at both edges of the sheet before each crease.
- The pleats land in the wrong place. Mark the top face in pencil before folding next time. A pleated band sitting slightly off-center still looks intentional.
Frequently asked questions
How much extra paper do pleats need?
Each pleat uses about twice its depth. A pleat 1/2 in (1.3 cm) deep takes up about 1 in (2.5 cm) of paper, so five pleats need roughly 5 in (13 cm) more than the normal measurement. Cut a little generously and trim once the pleats are folded and taped.
Can pleats be added after the gift is already wrapped?
Not neatly. Pleats shorten the paper, so a sheet already cut and taped to fit has no spare length to fold. Fold the pleats into the flat sheet first and tape them on the wrong side. Then position the box so the pleated area lands on the top or front face.
Which wrapping paper is best for pleats?
Solid or subtly patterned paper of medium weight with a matte finish gives the clearest result, because the folds cast small shadows that a busy print would hide. Thin glossy paper can tear along repeated creases, and foil paper keeps every mistaken fold, so both are harder to work with.