How to Wrap a Box of Any Size: Cubes, Shirt Boxes and Tall Boxes
Adapt the standard box wrap to any shape: how much paper a cube needs, where to put the seam on a flat shirt box and why tall boxes are wrapped lying down.
Tutorial at a glance
Materials
- The gift box
- Sharp scissors
- Clear tape and double-sided tape
- Ruler
- Bone folder or thumbnail
Once you know how to wrap a box of one shape, every other box uses the same folds. What changes is how much paper you cut, where the seam sits and how large the end flaps turn out.
This guide takes the standard wrap and adjusts it for the three shapes that cause the most trouble: cubes, flat shirt boxes and tall narrow boxes.
The standard wrap in brief
Every version below is built on these five steps.
- Place the box upside down on the wrong side of the paper, so the seam ends up on the bottom.
- Bring one long side of the paper up and over to the middle of the box and tape it to the box.
- Fold under about 1/2 in (1.3 cm) along the other long side, pull it snug over the first side and tape it.
- At each end, push the top flap down flat, fold the two side flaps in, crease the bottom flap into a point, fold it up and tape.
- Run a thumbnail or bone folder along every edge of the box.
If these steps are new to you, start with the beginner walk-through in how to wrap a gift and come back for the shape-by-shape adjustments.
How box shape changes the paper
The paper always goes once around the girth of the box, plus about 2 in (5 cm) of overlap. The ends are where shapes differ: each end needs a little more than half the box height, and about two-thirds of the height is comfortable.
| Shape | End allowance | Seam | Watch for |
|---|---|---|---|
| Cube | Large | Bottom center | Cutting the sheet too short |
| Flat shirt box | Very small | Bottom center or one long edge | Bulky ends from extra paper |
| Tall narrow box | Moderate | Bottom center, box on its side | The box tipping while you work |
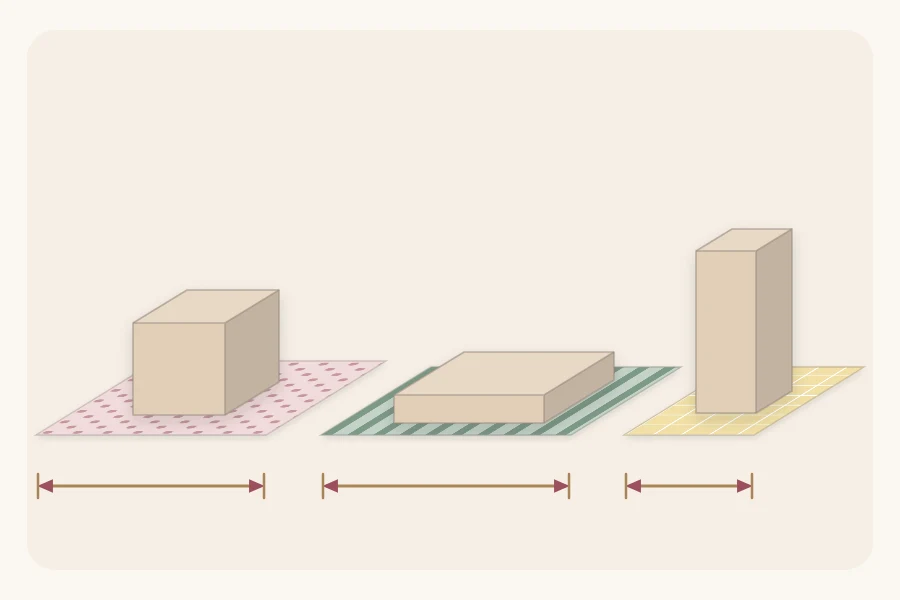
For worked examples and a quick way to size the sheet without a ruler, see how to measure wrapping paper.
Wrapping a cube
A cube is as tall as it is wide, so the end allowance is large in absolute terms. On a cube about 6 in (15 cm) on each side, every end needs roughly 4 in (10 cm) of paper. People often cut the sheet short because it already looks big.
- Check both directions before cutting. The girth of a cube is four times one side, plus the overlap.
- When you push the top flap down, the diagonal folds are long. Crease them fully, from the corner of the box to the edge of the paper, before folding the sides in.
- The last flap is a large triangle shape. If its point reaches past the edge of the box, fold the tip under to make a straight edge, then tape.
- Use medium-weight or kraft paper. Large flaps in thin glossy paper wrinkle and tear easily.
Since all the faces of a cube match, choose the smoothest face as the top before you tie a ribbon.
Wrapping a flat shirt box
Flat boxes need very little paper at the ends, because the end flaps are only as tall as the box is thick. For a box about 1.5 in (4 cm) deep, about 1 in (2.5 cm) at each end is enough. Any more creates a thick ridge.
The end folds are the same four moves in miniature. Work slowly, pinch each tiny diagonal and close the end with a narrow strip of tape.
Moving the seam to the edge
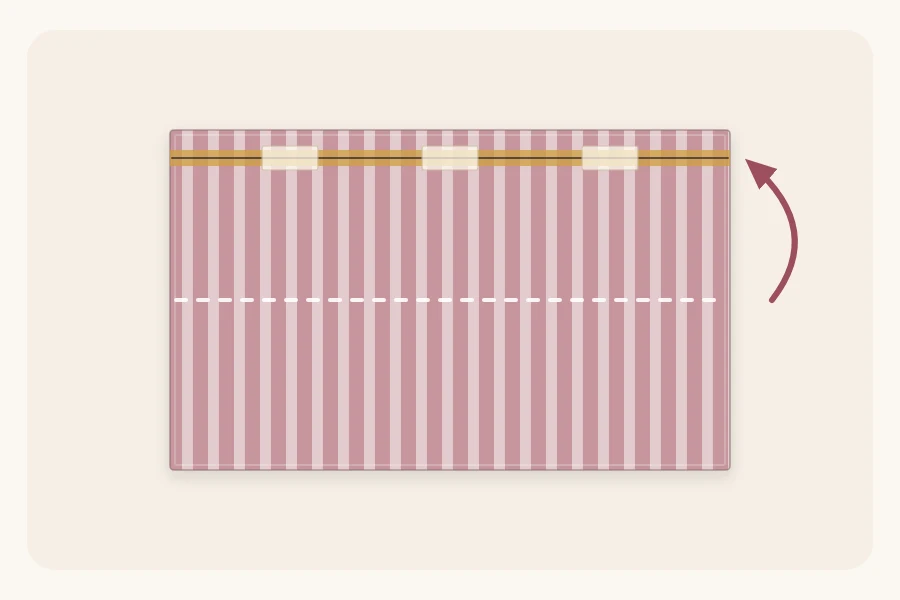
A shirt box is often seen from both sides, and a seam across the middle of the back can look untidy. You can move the seam so it sits along one long edge instead, leaving the top and bottom faces both clean.
- Set the box on the paper so that one cut edge of the paper lines up with a long edge of the box. Tape it there.
- Wrap the paper around the box until it comes back to the same edge.
- Fold the excess under so the folded edge sits exactly on the box edge, and fasten it with double-sided tape.
Tip
Shirt-box lids can slide off while you work. Hold the lid to the base with two small pieces of tape before you start wrapping.
Wrapping a tall narrow box
Tall narrow boxes are easiest wrapped lying on their side. Stood upright, the box tips over, and the folds would land on the top face, where everyone looks first.
- Lay the box down so its longest dimension runs along the table. Measure and wrap it as an ordinary long rectangle.
- The folded ends become the top and bottom of the standing gift. Make these folds as neat as you can, and use double-sided tape on the end that will face up.
- Decide which long face is the front, and keep the seam on the opposite face.
- Stand the box up only after every edge is creased.
The neat diagonals of a folded end look good on top of a tall box. The step-by-step folds are in how to fold clean corners.
Very large and very small boxes
For a box wider than your roll, join two sheets. Overlap them by about 1 in (2.5 cm) on the wrong side, fasten the join with double-sided tape and place it where a ribbon will cross. Matching a stripe or pattern at the join makes it almost disappear.
If the sheet is only slightly too short, try setting the box diagonally on it. Diagonal gift wrapping can cover a box that the straight method cannot.
For very small boxes, cut tape pieces in half lengthwise, so they do not dominate the ends, and use a thin, small-patterned paper. Scissors are sharp, so give adult help to a child cutting tiny pieces.
Finishing each shape with ribbon
Scale the ribbon to the box: about 1/4 to 3/8 in (6 to 10 mm) wide for small boxes, 5/8 to 7/8 in (16 to 22 mm) for medium ones, and 1.5 in (38 mm) or wider for large boxes.
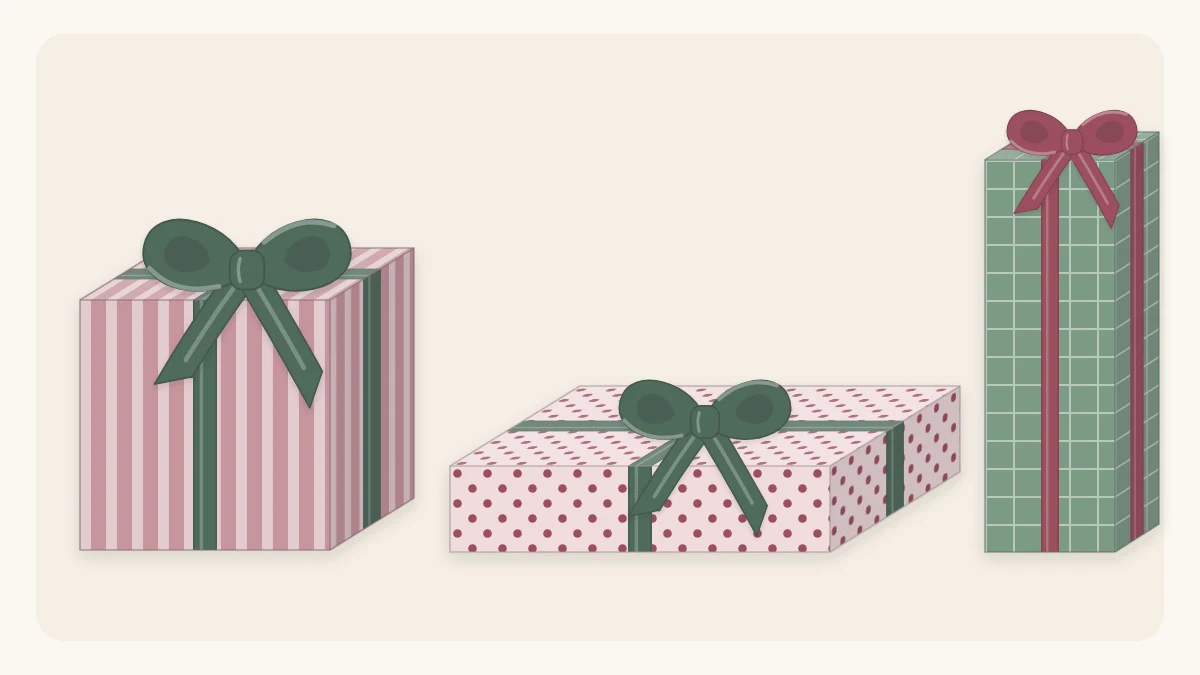
- Cube: a cross tie with a full bow on top suits the even shape.
- Shirt box: a single band around the width, or a cross tie set off-center, keeps it flat for stacking.
- Tall box: one band around the middle with a bow on the front face.
The cross tie and the bow itself are explained in how to tie a bow on a gift. Keep ribbon and twine away from babies and pets.
Frequently asked questions
Why does the paper run short when wrapping a cube?
A cube is tall compared with most gift boxes, and the paper at each end has to cover a little more than half that height. On a large cube that adds several inches to the sheet at both ends. Measure the ends as well as the distance around before cutting.
Where should the seam go on a flat shirt box?
The seam can run down the center of the bottom, as on any box, or along one long edge. Placing it on the edge leaves both large faces smooth, which is useful because flat boxes are often handled and seen from both sides. Double-sided tape keeps an edge seam invisible.
Should a tall box be wrapped standing up or lying down?
Lying down is easier. On its side, a tall narrow box behaves like an ordinary long rectangle and stays still while you tape. The folded ends then become the top and bottom when the gift is stood upright, so make those folds especially neat.